How to Have Text Read Aloud on a Mac
Macs have long been able to read text on your screen out loud to you without downloads or 3rd-political party apps. This feature has existed as Text to Speech, Oral communication, and as role of the VoiceOver characteristic.
The feature is now chosen Spoken Content, and it comes with more controls than previous iterations, likewise as a number of means to customize your experience with information technology.
Read on to learn everything Spoken Content has to offer, and why you might prefer to employ it over the Speech option in some Apple applications.
What Is Spoken Content on a Mac?
Spoken Content is an Accessibility feature that exists on your Mac (with a similar speech communication characteristic on iOS devices every bit well). It allows your Mac to read aloud text in word processing programs, websites, PDFs, and fifty-fifty ebooks in different ebook readers.
Some Mac apps, like Pages and Safari, allow text to exist read aloud with the macOS Speech function, available in the Edit card in those apps. But Spoken communication isn't bachelor everywhere, while Spoken Content tin exist activated via a keyboard shortcut basically anywhere.

Speech can start speaking and stop speaking, but that'south about information technology. Spoken Content gives you lot a lot more than control.
In addition to starting and stopping its reading, you can pause Spoken Content and take it pick up where it concluding left off. Voice communication will ever restart at the commencement of a text or highlighted department if yous finish and start it.
You can also change the reading speed of Spoken Content whenever you want, and select which voice you'd similar it to read aloud to you lot with. Spoken Content tin besides highlight words as you go, then y'all can follow along in the text during the reading.
All of this makes Spoken Content a piddling closer to third-party document readers, just it's free and already on your Mac!
It's not a completely perfect feature, of course. Spoken Content's voice options are all pretty robotic, and the feature can mispronounce words, names, and content similar Roman numerals.
You might therefore find the reading feel clunky or hard to listen to for extended periods of time. Simply you might besides get used to it quickly and get a lot of enjoyment from this gratuitous text-reading feature.
How to Set Up Spoken Content
To outset using Spoken Content, you need to have information technology turned on. To turn information technology on, head to System Preferences > Accessibility, and select Spoken Content from the side menu.

Check the box adjacent to Speak pick. Once that'southward done, Spoken Content will be bachelor to use!
There are more than elements to set up upwards in the Spoken Content menu under Accessibility's System Preferences before you start to employ the feature.
I chemical element is Arrangement Vocalization, which is the voice Spoken Content will read aloud with. Select any option from the Arrangement Phonation dropdown menu and striking the Play button beside it to hear a sample of a vox and make up one's mind if y'all like the manner it sounds.
Once yous've selected a voice, determine on the Speaking Rate (the speed at which text is read aloud to you once Spoken Content is activated). This can be altered every bit Spoken Content reads, but if y'all prefer a fast reading speed, you can make that the default.
Move the marker along the Speaking Charge per unit slider to set the default read aloud speed for Spoken Content. Clicking Play will let you hear a sample of this speed equally you make your determination.
As nosotros mentioned in the previous section, Spoken Content is activated with a keyboard shortcut. This keyboard shortcut usually defaults to Option + Esc, but y'all can set the shortcut to whatever you want to simplify using it or remembering the shortcut more easily.
Past clicking the Options button beside Speak selection you lot can besides select what, if annihilation, gets highlighted equally Spoken Content reads. You can too select the color of the highlight, whatever styling on the sentences existence read out, and whether you can run into the Spoken Content controller as you apply it.
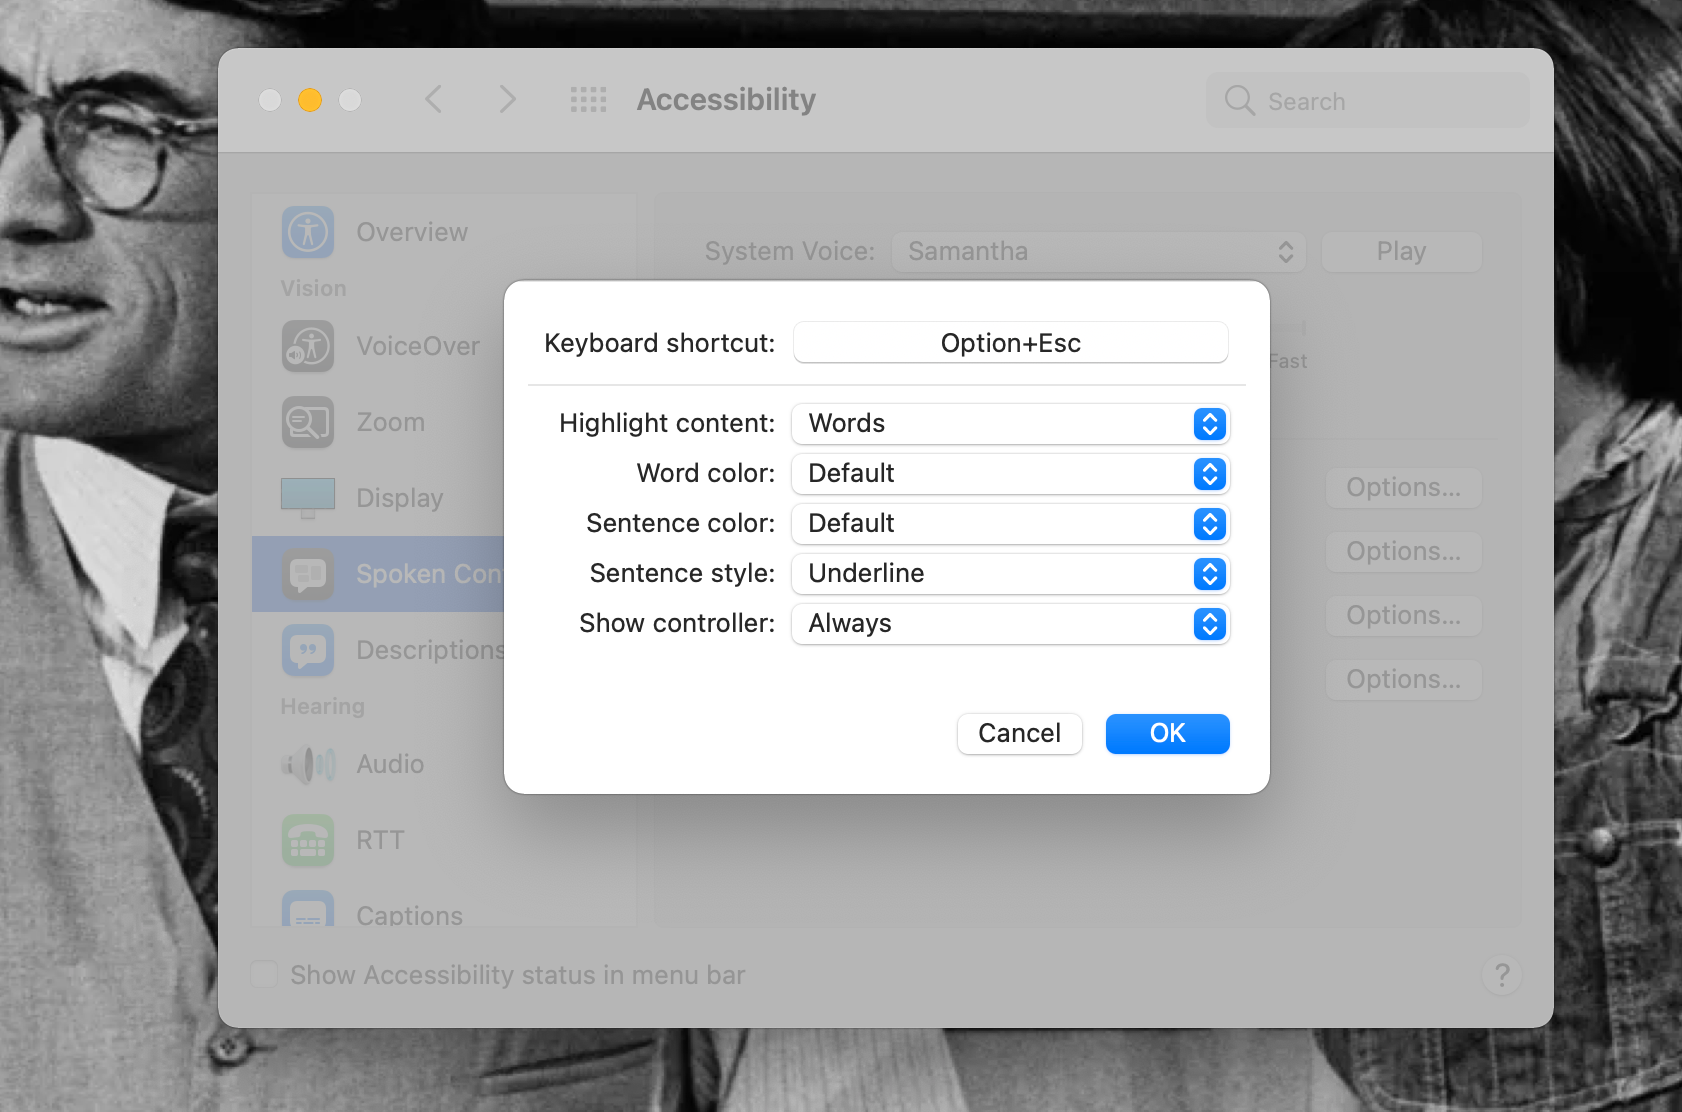
We'd encourage having Show controller set up to Automatically or Always, so you lot tin can apply all of Spoken Content'due south controls as it reads.
E'er lets the controller stay on screen once y'all've used the keyboard shortcut one time, so you tin can reactivate information technology without needing to utilise the shortcut once again. Automatically will let the controller disappear once you hit the Stop push on it.
Letting Spoken Content highlight text as information technology reads is really useful when reading out longer texts, as it lets you see where you are in a file and helps y'all navigate to where you want to commencement reading from later on. Nosotros'll become over navigating texts and using Spoken Content in the next section.
Using Your Mac's Spoken Content Feature
Information technology's pretty easy to use Spoken Content once you have it set up. Kickoff, y'all demand some text you lot desire to have read aloud. Then y'all need to navigate in the text to where you want Spoken Content to commencement reading.
Navigate the text by clicking to the left of the first word you want to have read aloud or past putting your text cursor earlier the word, if you're reading an editable text. Spoken Content will always showtime with the closest give-and-take you clicked virtually or had your cursor beside.
You lot can besides highlight office of a text to accept Spoken Content read just that role out, and not take it read anything before or afterwards.
To make Spoken Content start reading, hitting Option + Esc, or any keyboard shortcut you set for the feature. The reading will begin, and Spoken Content's controller will announced.
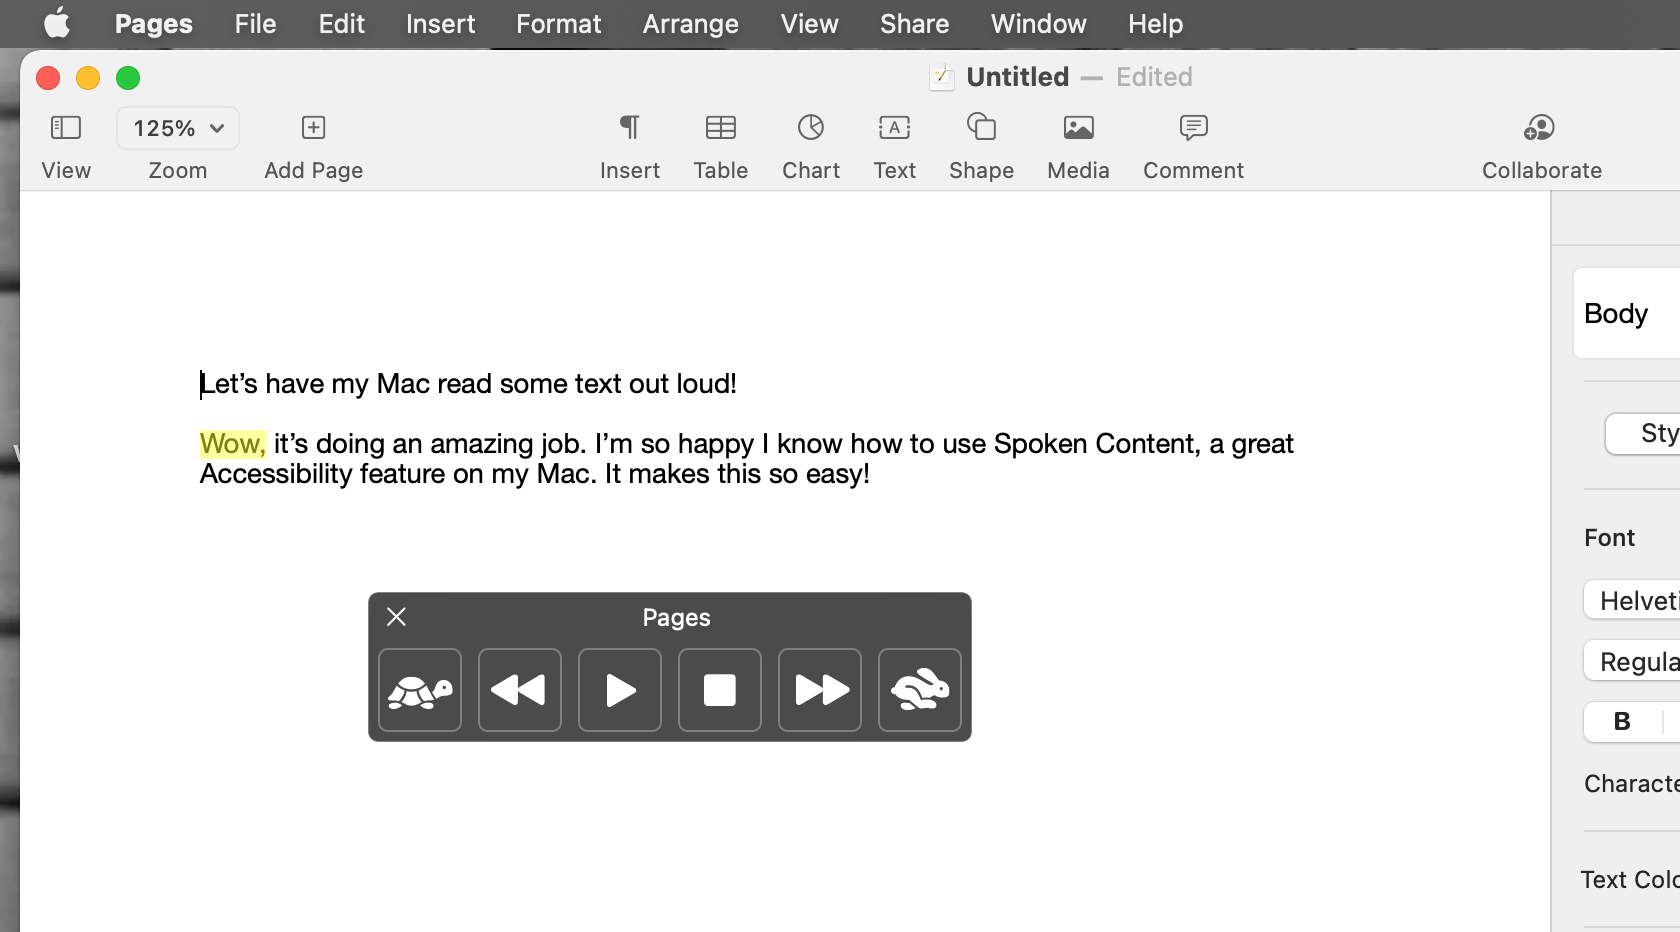
The controller will show the proper name of the application it's reading from, along with a few buttons. The buttons do the following:
- Turtle: Irksome down Spoken Content's reading pace.
- Rewind: Get back to the start of a sentence and read from at that place.
- Play/Pause: Start or pause Spoken Content'south reading. Hitting Play after pausing will restart the reading where you left off, no matter where y'all've clicked since.
- Terminate: Cease Spoken Content's reading entirely. This lets you navigate to a new place in the text to showtime reading again, and will close the controller if you don't have Show controller in Spoken Content's preferences set to Always.
- Fast-Forward: Skip alee to the adjacent sentence and read from at that place.
- Rabbit: Speed up Spoken Content'due south reading pace.

The controller also has an X button to close it, which will end Spoken Content from working until you lot type its keyboard shortcut once more.
Use the controller buttons to manipulate how and when Spoken Content reads out loud to you. Spoken Content will continue reading until you hit the pause or cease buttons, or until it runs out of text in a file to read.
This ways yous can open other applications, or practise other work while listening to Spoken Content. This is neat for taking notes on texts, and for multitasking while using your Mac.
But you can also just sit down and mind to text with Spoken Content. It's a feature you tin use according to your own needs and desires!
Offset Listening to Text With Mac's Spoken Content Characteristic
Spoken Content is a great tool for listening to text on your Mac instead of reading it. Whether y'all ever have trouble reading documents on a computer or like how Spoken Content gives yous the power to multitask while you read, it'due south a feature you can start using very hands.
Nosotros hope the above guide helps you get started using Spoken Content. It's very handy in a big multifariousness of situations, and even with a robotic voice it could seriously change how you work on your Mac.
Near The Author 
santistevanfitain.blogspot.com
Source: https://www.makeuseof.com/how-to-use-spoken-content-mac/
0 Response to "How to Have Text Read Aloud on a Mac"
Post a Comment